Hi guys, today as an extension of our post, Wallpapering your home, wallpapering-your-home, we have a step by step guide to applying your wallpaper, just for you.
This is an easy project to embark on. With reference to the previous post where we detailed the method of calculating the amount of wallpaper you’ll need, we are ready to detail step by step the method of applying your wallpaper.
Preparation of the surface to cover
- Stripping of old wallpaper
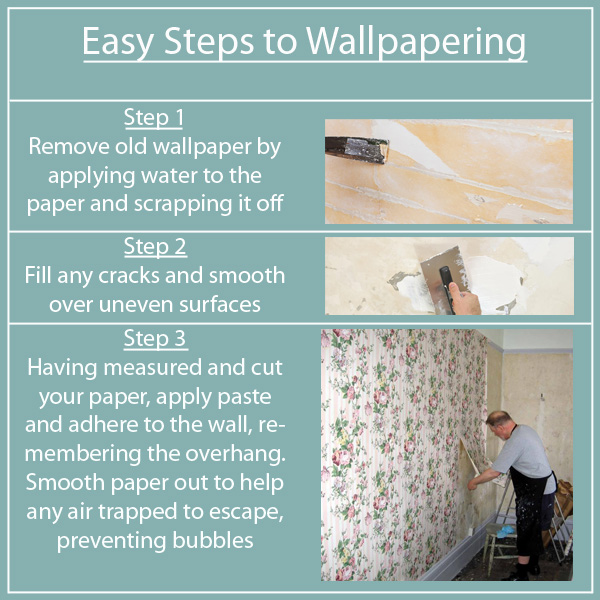
Old wallpaper is rather easy to remove however very time consuming. With a clean sponge or paintbrush, soak the wallpaper thoroughly with water. Once soaked, gently strip or scrape the old wallpaper off the wall. Remember to scrape gently to prevent any damage to the wall surface.
Allow the surface to dry completely.
-
Filling of cracks
Next, check for any cracks and uneven surface. Fill any cracks or smooth over any uneven patches in the wall surface.
As the surface is now ready for papering, we look at the planning.
Planning
-
Pattern matching
Pattern matching of wallpaper can be daunting, but as per our calculations in post insert link and this easy guide, you should have no problem,
Start by laying a measured part of a roll design facing up on a flat surface, Take another measure part off the roll and lay it along side the first piece. Match up the design. Remember to allow for the 5cm overhang at either end.
-
Establishing a vertical
Hanging the first strip of wallpaper straight is crucial. Use a plumb line or a spirit level
Remember to apply this principal on each wall. Do not hang from window sills as these may not be straight.
-
Sequence of papering
There are no set rules regarding the direction in which you should wallpaper, however, paper in a logical way to make the most of your patterned paper.
Logically there are 2 ways to paper.
Focal Point;
Start papering a focal pint by positioning the centre of your pattern at the centre of your focal point. From there work outward first to the left, all around the round the room to a door or window across from your focal point. Go back to your focal point and paper to the right, all around the room to the door or window.
Time
Wallpapering is time consuming, especially when a the paper is patterned. Please allow enough time.
Cutting
As mentioned before, lay the paper on a flat surface or table. Mark the length of your first piece and using a long wallpapering scissor, cut the wallpaper.
Applying the paste
Line up your wallpaper with the edge of the table, or T Square to ensure it is straight. Apply the paste from the centre working the paste out to the edges.
Hanging standard lengths
Place the panel at the top of the wall, leaving your 5cm overhang. Smooth the paper with a clean wide brush from the centre outward to adhere the whole piece of paper to the wall evenly. This will also smooth out any trapped air.
Gently tuck the paper in the join where the wall meets the ceiling. This will create a crease.
Carefully peel back the top of the paper and cut along the crease you’ve created. Alternatively, gently tuck the paper into the joint and cut by running a knife along the edge.
Wipe away any excess paste with a clean sponge, before it dries.
Next hang your second panel of paper along side the first. Remember to pattern match.
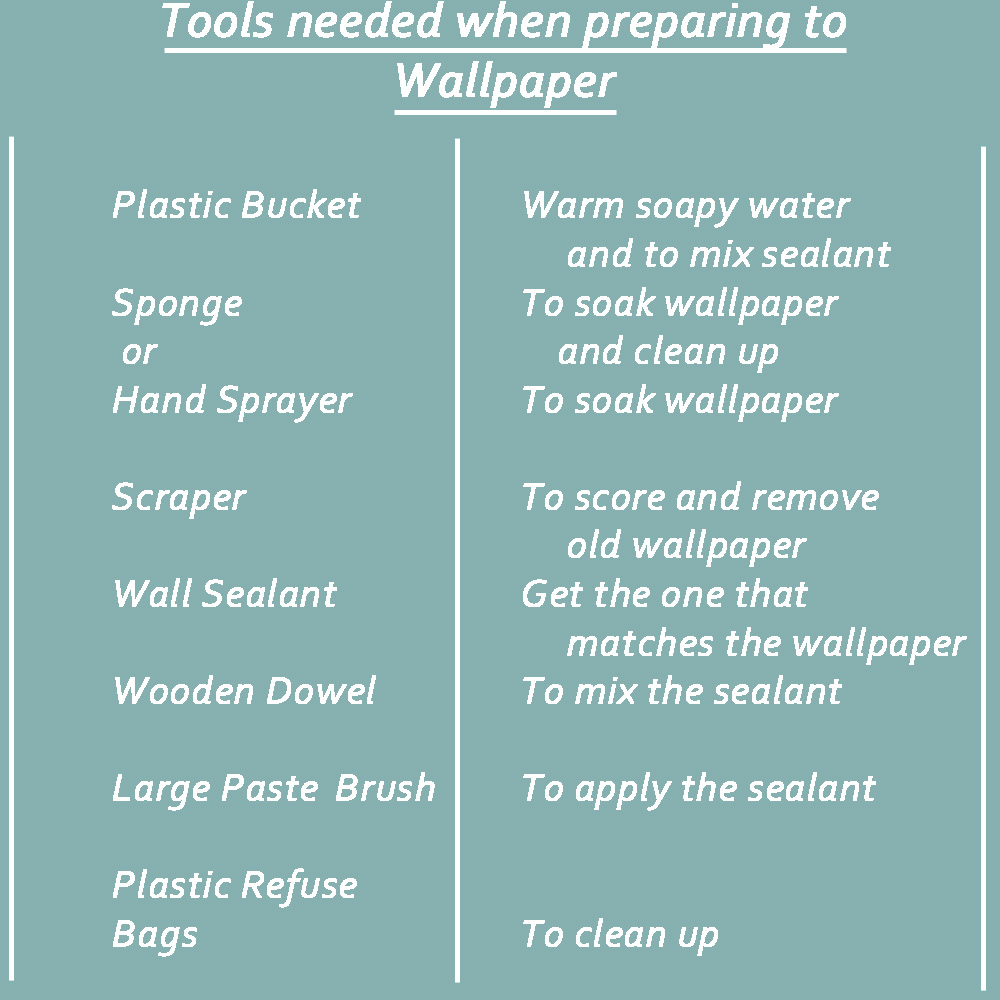
And that is as easy it is to hang your own wallpaper. Well I hope this post has made it less daunting. I have also included a easy check list of items you will need, above.
As always stay safe and remember to leave a comment, we love hearing from you and do follow us on social media. Till next time…thank you for reading.